
To make a Case Ledger entry, click on the Add button.

After the Add button is selected, an entry popup will display.
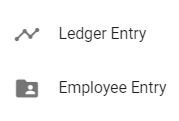
To make a ledger entry, click Ledger Entry. To make an employee entry, click Employee Entry.
Ledger Entry
When Ledger Entry is selected, a Ledger Entry popup will appear.

Ledger Entry is divided into 4 buttons: Revenue, Affected Asset, Insurance Compensation, and Resources. These buttons reveal additional popups. To make an entry, click on the appropriate button.
Revenue
Clicking on Revenue will display the Revenue popup.
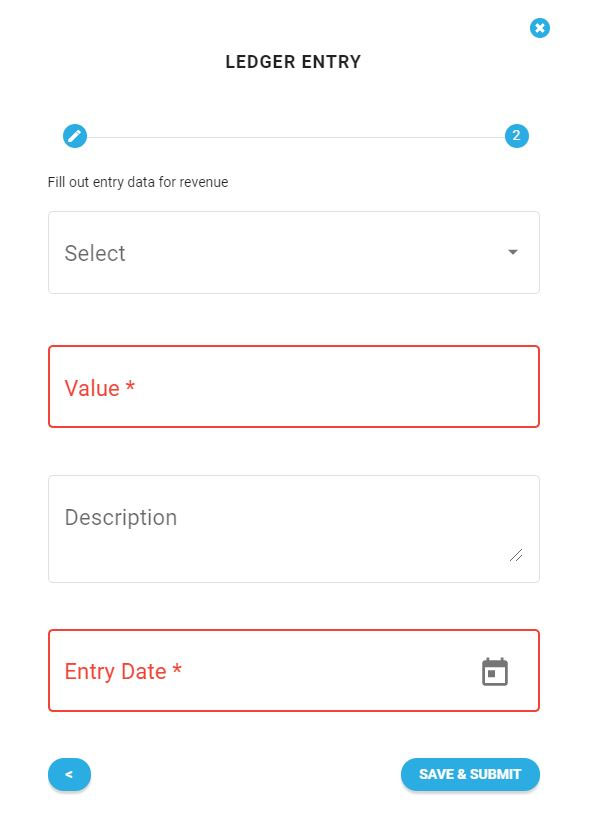
Clicking on Select creates a dropdown selection. Select the appropriate revenue type. Enter the Value and Description. When entering the value, use the whole dollar amount. Do not put periods or commas (e.g., $67,893.29 should be entered as 67893). To enter the date, click on the calendar icon and select the appropriate date. Once complete, click on the Save & Submit Button.
To exit the entry without saving or submitting, click the X at the top right corner of the popup.
Affected Assets
Clicking on Affected Assets will display the Affected Assets popup.
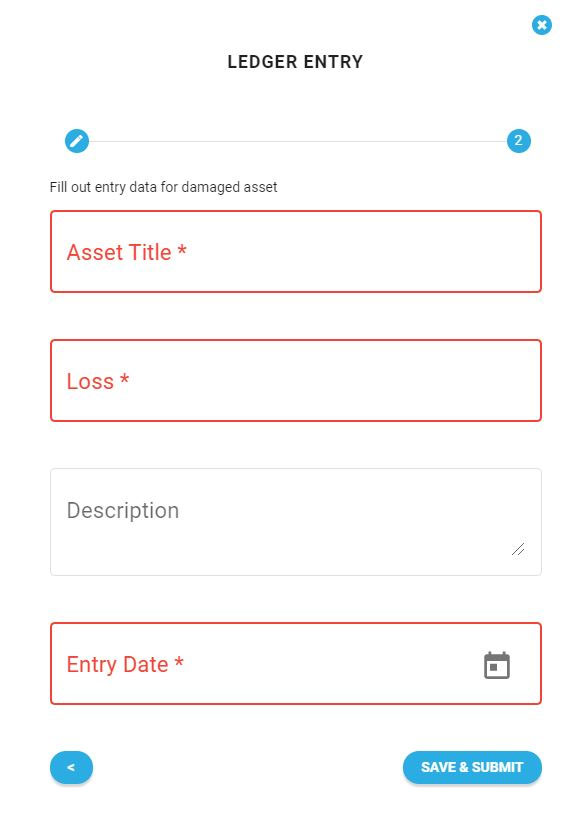
Enter the Asset Total, Loss, and Description. When entering the Loss, use the whole dollar amount. Do not put periods or commas (e.g., $67,893.29 should be entered as 67893). To enter the date, click on the calendar icon and select the appropriate date. Once complete, click on the Save & Submit Button.
To cancel out of the entry without saving or submitting, click the X at the top right corner of the popup.
Insurance Compensation
Clicking on Insurance Compensation will display the Insurance Compensation popup.

Enter the Claim Title, Claim Check Amount, and Description. When entering the Claim Check Amount use the whole dollar amount. Do not put periods or commas (e.g., $67,893.29 should be entered as 67893). To enter the date, click on the calendar icon and select the appropriate date. Once complete, click on the Save & Submit Button.
To cancel out of the entry without saving or submitting, click the X at the top right corner of the popup.
Resources
Clicking on Resources will display the Resources popup.
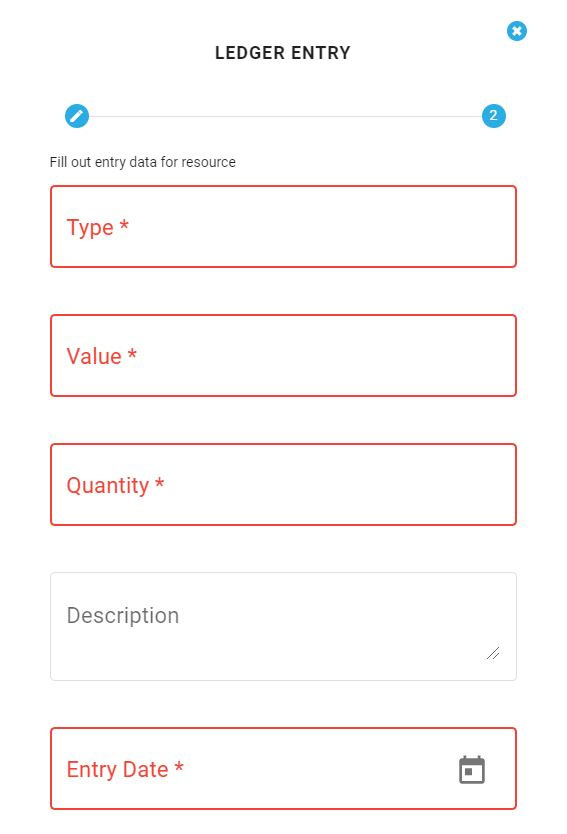
Enter in the Type, Value, Quantity, and Description of the resource. When entering the Claim Check Amount, use the whole dollar amount. Do not put periods or commas (e.g., $67,893.29 should be entered as 67893). To enter the date, click on the calendar icon and select the appropriate date. Once complete, click on the Save & Submit Button.
To cancel out of the entry without saving or submitting, click the X at the top right corner of the popup.
Employee Entry
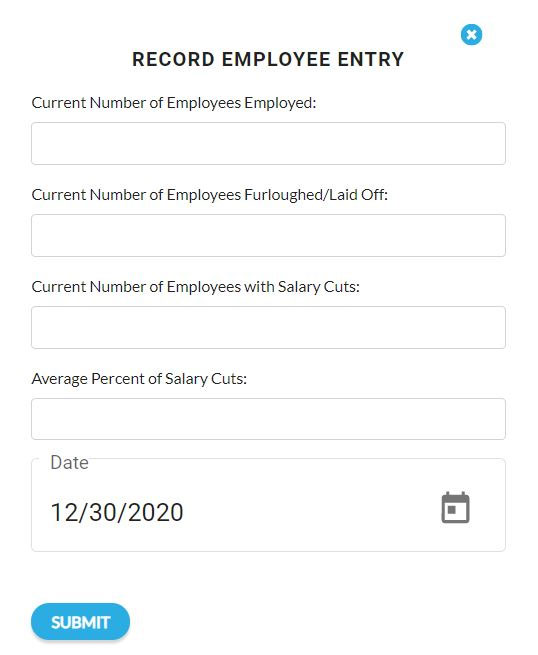
The employee entries from an impact case will be entered as the first employee entries. To make an employee entry, click Add and then click on Employee Entry. The employee entry popup will appear.
Enter the Current Number of Employees Employed, Current number of Employees Furloughed/Laid Off, Current Number of Employees with Salary Cuts, and Average Percent of Salary Cuts. When entering the Percent of Salary Cuts, do not include the % symbol. If the date is incorrect, click on the calendar icon and select the appropriate date. Once complete, click on the Save & Submit Button.
To cancel out of the entry without saving or submitting, click the x at the top right corner of the popup.
When entries are made to Revenue, Affected Assets, Employees, or Resources, they will populate in the appropriate tab list.
Downloading Case Ledger
The Case Ledger can be downloaded as a CSV file by clicking on the Download Ledger button.
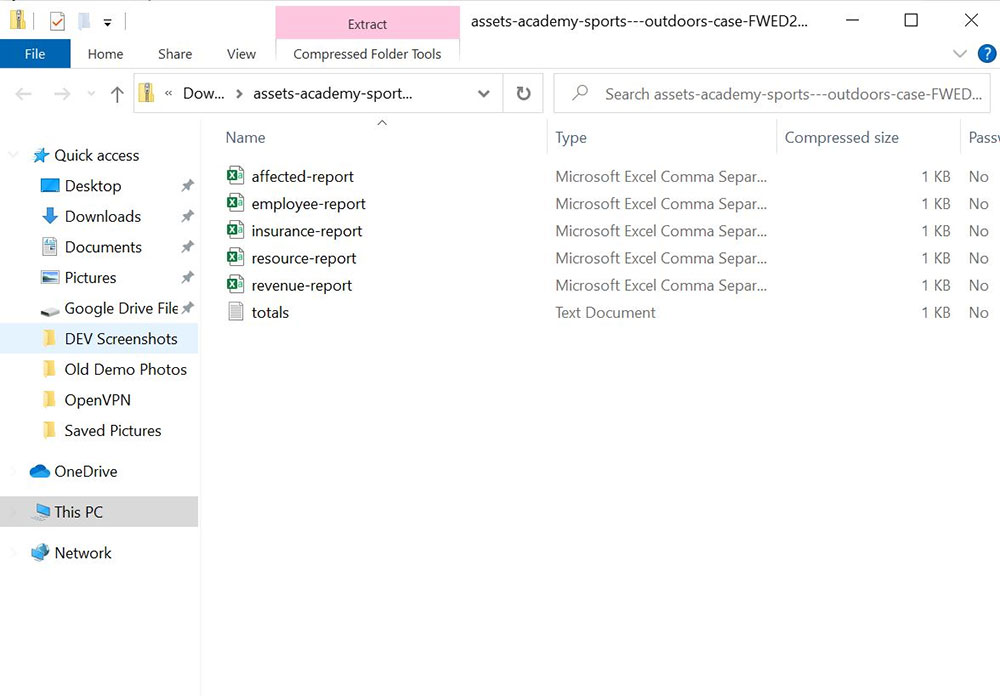
The ledger download will include the Affected Report, Employee Report, Insurance Report, Resource Report, Revenue Report, and Totals.