
Business Owner Impact Case Entry
When a business is added, the business owner will receive a confirmation email. They will then have the option to immediately enter their impact case by clicking Add Impact Case. They can also enter the case at a later time by clicking Finish Later.
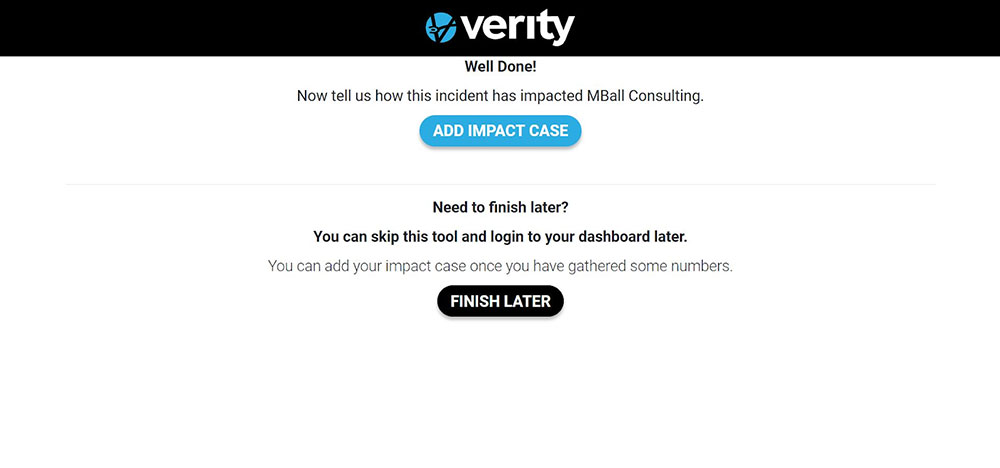
Only a business owner can enter an impact case into the system.
Administrative Impact Case Entry
There are two ways to enter an Impact Case into the system.
- Click on the Create Impact Case Button on the top right corner of the Dashboard
- Click on the Impact Cases sidebar tab, and then click on the Add New button on the Impact Cases page
The same Impact Case entry box will display whether from the:
- Business owner email Add New Impact Case button
- Dashboard Impact Case Button
- Impact Cases page Add New button
The impact case is broken down into 4 sections: Impact Case Details, Revenues, Employees, and Physical Damage.
Impact Case Details

The impact case can be canceled at any time by clicking the Cancel button at the top right corner of the page.
Select Incident
Click on the Select Incident box and a dropdown with the incidents that have been entered into the system will appear. Click on the appropriate incident.
Select Affected Business
Click the Select Affected Business box, and a dropdown with all of the businesses will appear. Select the business for the case. Once the business is selected, the business address will populate and the business map will show the location of the business.
Select Impact Level
Click the Select Impact Level box, and a dropdown will appear with all of the levels. Click on the appropriate level.
To see the definition for each level, click on Impact Level Definitions.
Find Your Categories
Click the Find Your Categories box, and a dropdown will appear with all of the categories. The selected category will appear below the box. If the impact has multiple categories click on each category that applies.
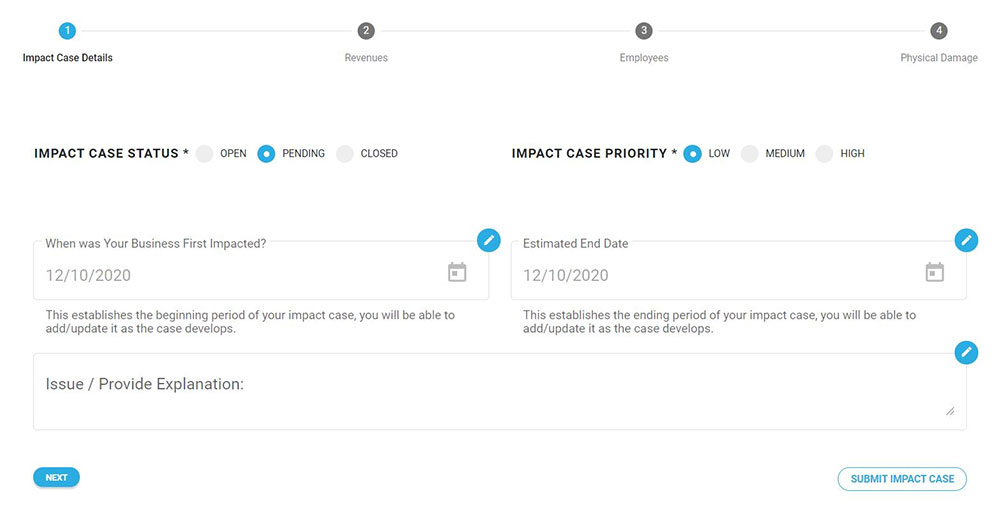
 Status And Priority
The Impact Case Status and Impact Case Priority appear for users with administrator access. The status and priority are not visible for users with business access.
The default setting for the Impact Case Status is Pending and the default for Impact Case Priority is Low.
Date Boxes
The date boxes display the current date. To change the date, click on the box calendar, and a calendar popup will appear.
The calendar will display the current month and year, with the current day in a blue circle. To change the day on the current month, click on the day, and the blue circle will appear on that day.
Clicking on the month and year on the top right corner of the calendar will display a list of years. To view previous years, click on the left arrow on the top right corner of the year. When the year is selected, a list of the months will appear. Click on the desired month to display the month calendar for the year and month selected. Click on the desired day to set the date in the date box.
Issue / Provide Explanation
The Issue/Provide Explanation is a text box with a 250-character limit. This box is mandatory. The explanation should establish the impact the incident had on the business.
Example explanation: “Hurricane struck the area and heavily damaged the business building. Business had to shut down until the building could be repaired.”
Once an explanation is entered, click Next on the bottom of the page, and the Revenues section will display. The Submit Impact Case button will not activate on an initial entry until the impact case is completed.
Revenues
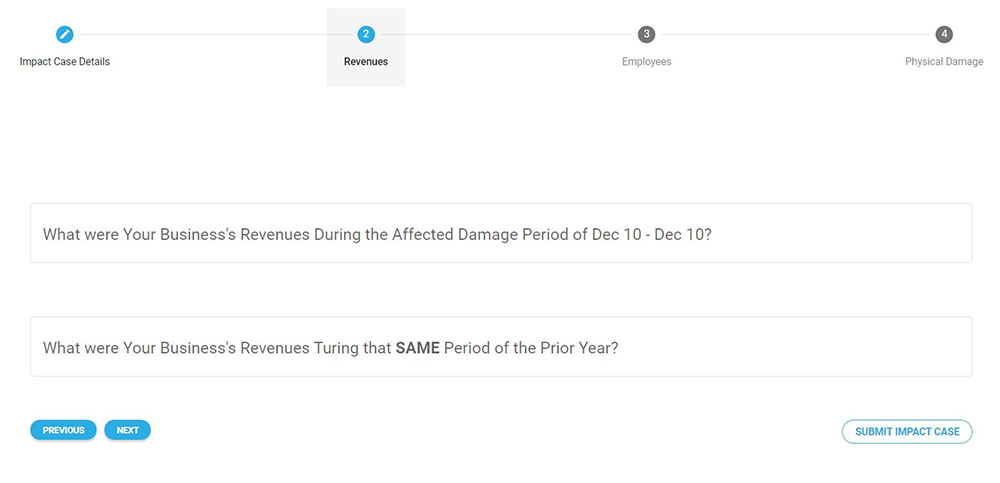
When the Revenues section appears, a Previous button appears on the bottom of the page. Click on the Previous button to go to the previous page.
The revenue for the damaged period and prior year are number boxes. It is mandatory to enter a number. When entering numbers, enter the number without periods or commas. If the number is zero, enter a “0” in the box.
These numbers will be calculated in the Impact Ledger.
When numbers are entered, click Next. The Employees section will display.
Employees

The boxes in the Employees section are number boxes. The numbers entered will be added to the Case Ledger. It is mandatory to enter a number. If the number is zero, enter a “0” in the box.
When entering the Total Salary Cuts number, enter the total number of employees that received salary cuts as a result of the incident. The number should not include the employees laid off.
When entering the percentage number, enter the rounded percentage number. Do not enter periods or the % symbol.
Once numbers are entered, click Next. The Physical Damage section will display.
Physical Damage
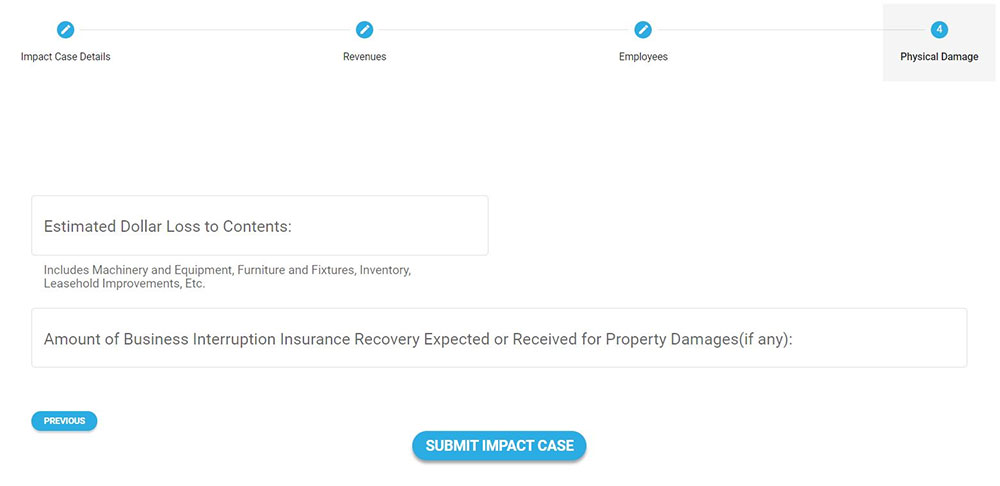
The Physical Damage section boxes are number boxes. It is mandatory to enter a number. When entering numbers, enter the number without periods or commas. If the number is zero, enter a “0” in the box.
Once numbers are entered, click Submit Impact Case.