
The second thing an administrator must do is create an incident for tracking purposes.
To create an incident, click in the Incidents tab on the dashboard sidebar. The incidents page will display.
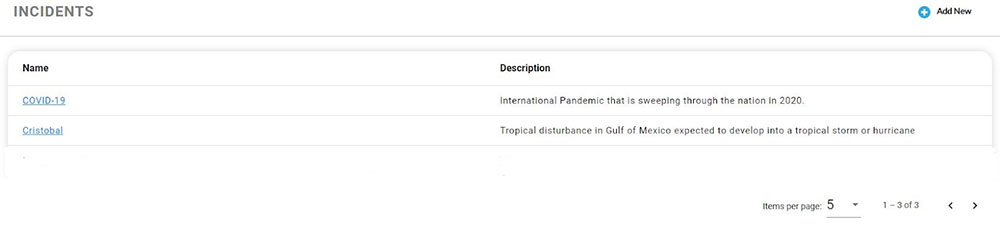
In the top right corner of the Incidents Page is the Add New button. Click on the add new button. The New Incident page will appear.
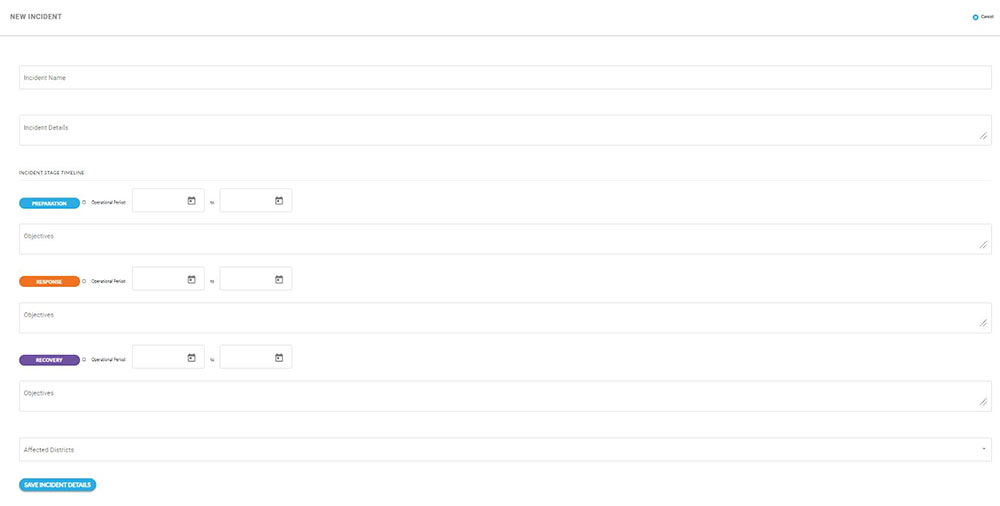
Incident Name
Create the name of the incident. This can only be completed by the administrator.
Incident Details
There is a 250-character limit for incident details.
Incident Stage Timeline
There are 3 incident stages with a timeline for each stage. Next to the stage is a check box which when checked, puts the incident in the selected stage. Next to the checkbox is the operational period with 2 date boxes. To enter a date, click on the calendar in the date box. A calendar window will appear and the date can be selected by clicking the date on the calendar.
Note: All the stage timelines are not used on every incident. Some incidents may have all 3 stages while other incidents may have 1 or 2 stages.
Objectives
Below each stage is the Objectives Box. Type the objectives for each stage into this box. When objectives are typed into the box, a View Objectives button will be activated both on the incident and submitted impact case.
There is a 250-character limit within the objectives box.
Affected Districts
The Affected Districts is a dropdown box where you can select all districts affected by the incident.
When the incident is completed, click Save Incident Details at the bottom of the page to save.