
To edit a district, go to the Districts Page and click on the district name to the right of the map or from the list view. The district’s page will display.
Click on the Edit District button located in the top right corner of the screen. The Edit District page will appear.
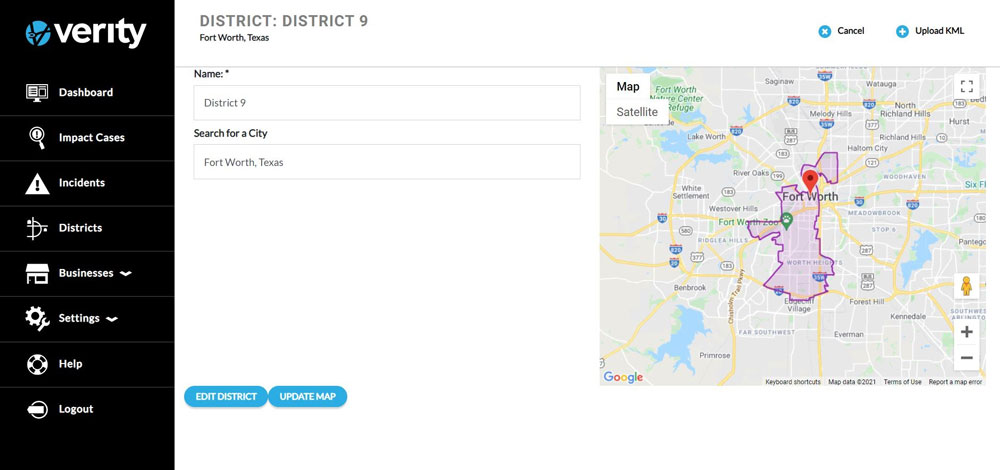
Edit the district name. If the name of the district is the only correction made, click Edit District to save the change.
The ability to edit the district boundaries varies depending on how the district was created. To update the district boundaries, click Update Map.
The Defining The District Boundaries popup window will display. If the district was a KML upload, a new district KML must be uploaded. To change a KML district, click the Upload KML button.
If the district was hand drawn, click on Hand Draw. The District Map will display. The polygon dots around the border will appear and the border of the district can be redrawn. After the district is redrawn, click on Save.