
Dashboard Tab
Selecting the Dashboard tab will return you to the dashboard.
Impact Cases Tab
Selecting the Impact Cases tab will display the impact cases page.
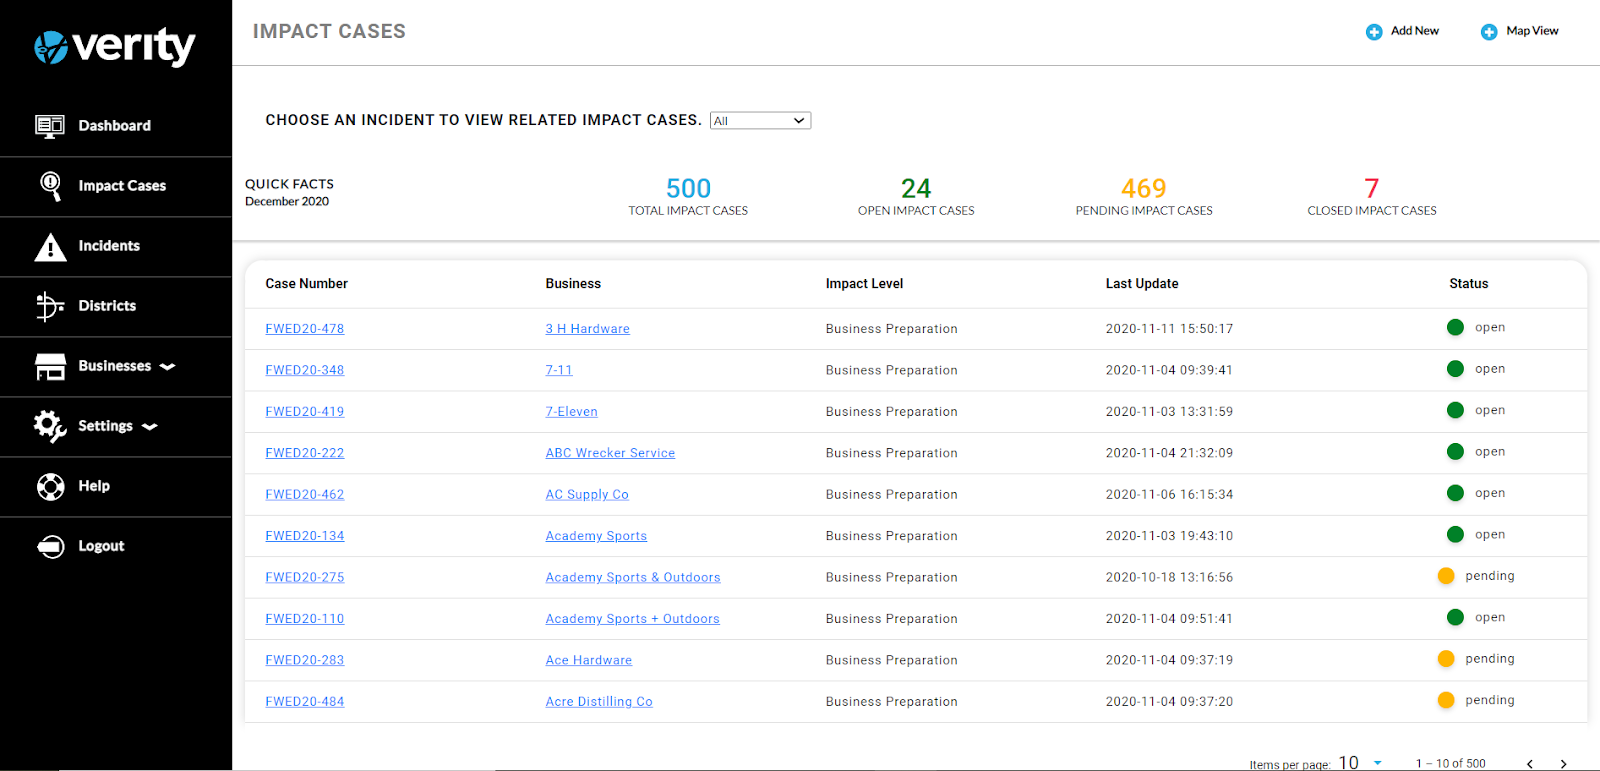
At the top of the Impact Cases page is the Choose An Incident To View Related Cases selection box, along with Quick Facts. Quick Facts displays the total number of cases, as well as the number of open, pending, and closed cases. The statistical information on the page is dictated by the Choose An Incident To View Related Cases selection box. As the selected incident changes, the statistical information updates.
The Impact Cases page provides a list of all of the cases entered into the system. The list of cases provides the Case Number, Business, Impact Level, Last Update, and Status in columns. The columns can be sorted by clicking on Case Number, Business, Impact Level, Last Update, or Status. To view an impact case, click on the impact case number. To view a business, click on the business name.
Located in the top right corner of the page are the Add New and Map View buttons. Selecting the Add New button will display a new impact case, where a new case can be created.
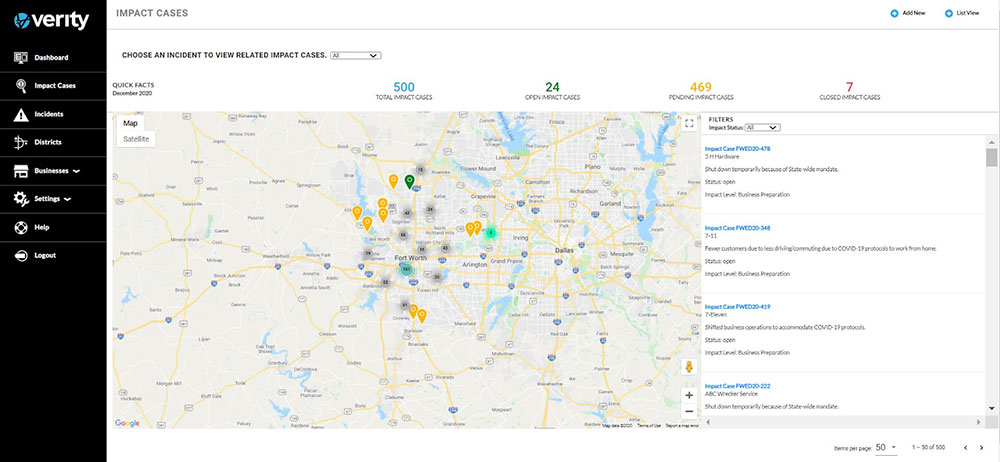
The Map View button is a toggle button, which will change the list of cases to a geographical map.

The maps in the Verity system are powered by Google Maps. The Map and Satellite View buttons are located on the top left corner of the map, the Full Screen View button is located on the top right corner of the map, and the Street View and Zoom buttons are located on the bottom right corner of the map. The map may also be zoomed in and out by using CTRL + scroll.
The pins on the map indicate the location and status of impact cases. If there are numerous cases near one location, a cluster will appear with the number of cases in the cluster. Click on the cluster to expand a more detailed list of the cases.
To the right of the map is a list of the cases that are on the map. Clicking on a case will zoom the map to the area the case is located. Clicking on the Impact Case Number will display the impact case.
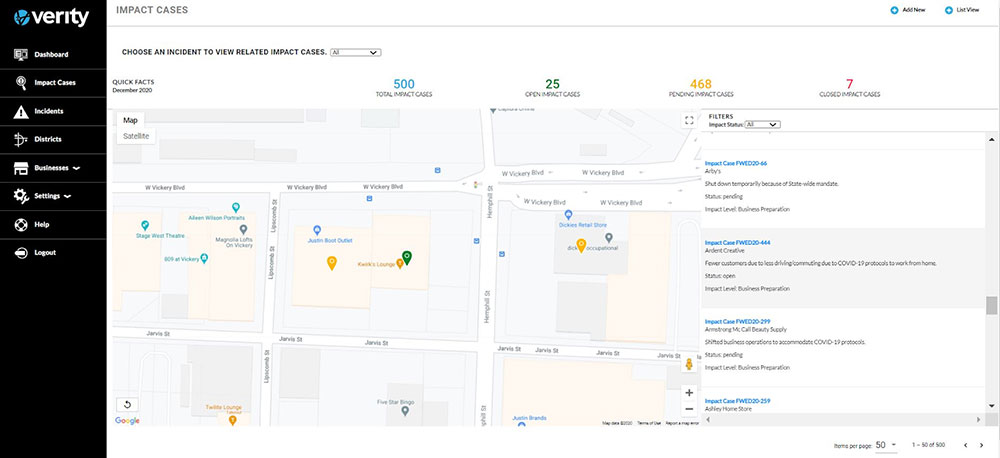
To exit out of the zoomed-in map view, click the back icon on the lower left corner of the map.
Click on the impact case within the list on the right, and the case will display. To exit out of the impact case, click the browser’s left (back) arrow.
Incidents Sidebar Tab
Selecting the Incidents Tab will display the Incidents page.

The Incidents page provides a list of the incidents that have been entered into the system. On the top right corner of the page is the Add New button. Click on it to create a new incident. Incident details can be viewed by clicking on the incident name.
Districts Sidebar Tab
Selecting the Districts Tab will display the Districts page.

The Districts page provides a view of the impact of incidents on a district level. Located on the top right corner of the page are the Add New and View buttons. The Add New button is used to add a new district. The View button is a toggle feature that allows you to toggle between map view and list view.
The Choose An Incident To View Related Cases selection box is located on the top of the page, along with Quick Facts.
The page also displays a map that displays the districts that have been created. To the right of the map is a list of the districts that have been created. The list includes the District Name and the Quick Facts for the district. At the bottom of the District Page is the Impact Ledger.
District Map
Clicking on the district name will display that district.
The single district page will display a map of the district. The pins on the map indicate the location and status of the impact cases in the district. If there are numerous cases near one location, a cluster will appear with the number of cases in the cluster. Click on the cluster to see the list of specific cases.
Below the map is a list of the cases in the district with the Business, Incident, Impact Level, Impact Case Number, Last Updated, and Status. The list can be sorted by clicking the column name.
Clicking on a business will display the business. Clicking on an incident name will display the incident details. Clicking on a case number will display the case.
Business Sidebar Tab
Selecting the Business Tab will display both Permanent Businesses and Temporary Businesses. Clicking on Permanent Businesses will display the list of Permanent Businesses. Clicking on Temporary Businesses will display the list of Temporary Businesses.
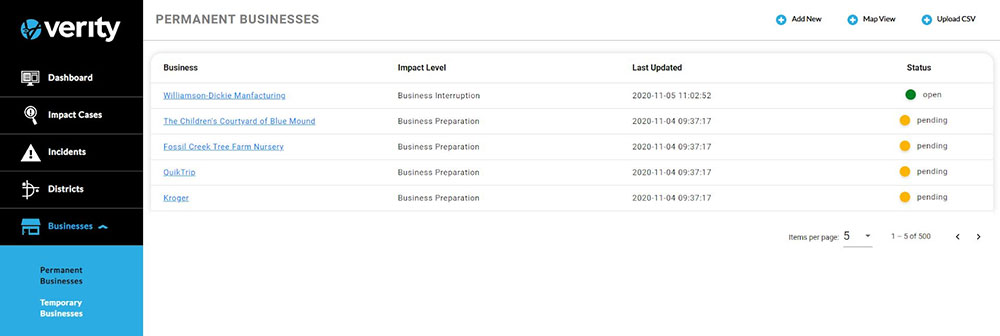
The Permanent or Temporary Businesses page will display a list of businesses including their Business (name), Impact level, Last Update, and Status in columns. The columns can be sorted by clicking on each heading. Clicking on a business’s name will direct you to that business’s profile.
At the top right corner of the page are the Add New, Mapview, and Upload CSV. The Add New Button is used to add a new business. The Map View button is a toggle button and the button will change to List View when selected. Clicking the Map View button will display the map of the businesses.
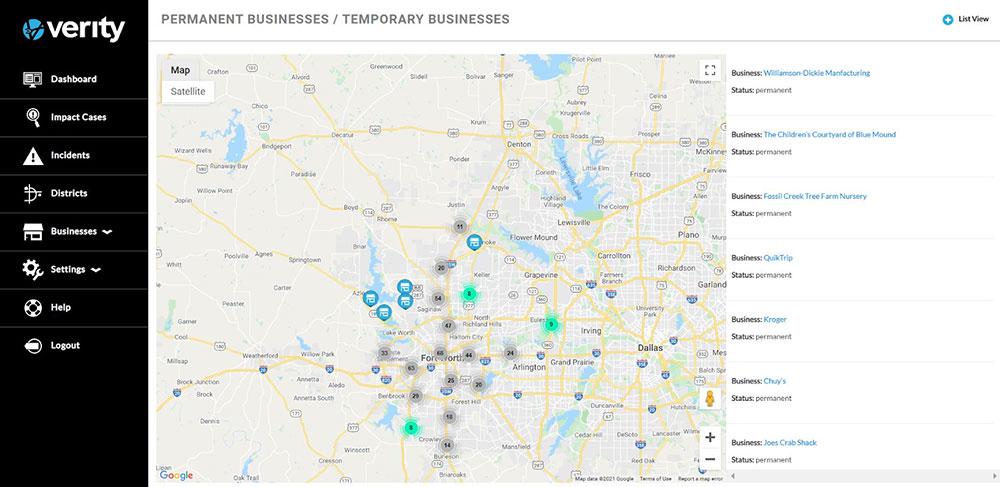
The pins on the map indicate the location of the businesses. If there are numerous businesses near one location, a cluster will appear with the number of businesses in the cluster. Click on the cluster to zoom in and view that area’s businesses.
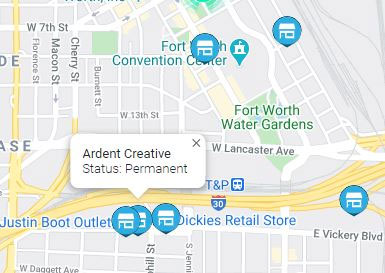
Clicking on a business pin will display a popup with the name and status of the business. To exit the popup, click on the x in the top right corner of the popup.
To the right of the map is a list of the businesses on the map. Each business is in a box that displays the status of the business. Clicking on the business box will zoom the map to the area the case is located. Clicking on the business name will display that business’s profile.
Settings Sidebar Tab
The Settings tab allows administrators to view Users, Add Users, Invite Users, Onboard Upload, edit Incident Stages, Levels, and Categories, and view Profile.

Help Sidebar Tab
Selecting the Help tab will open the Verity Help Desk
Logout Sidebar Tab
Selecting the Logout tab will immediately log the user out of the system.